
There is nothing quite as satisfying as biting into a perfectly soft, buttery sugar cookie that’s been dressed up with delightful royal icing designs. This Homemade Vanilla Sugar Cookies with Royal Icing Decorations Recipe combines a classic vanilla-scented cookie base with beautiful, customizable icing details to make every bite as fun as it is delicious. Whether you’re baking for a holiday, special occasion, or simply to brighten up your day, these cookies bring warmth, sweetness, and creativity to your kitchen like no other treat can.
Ingredients You'll Need
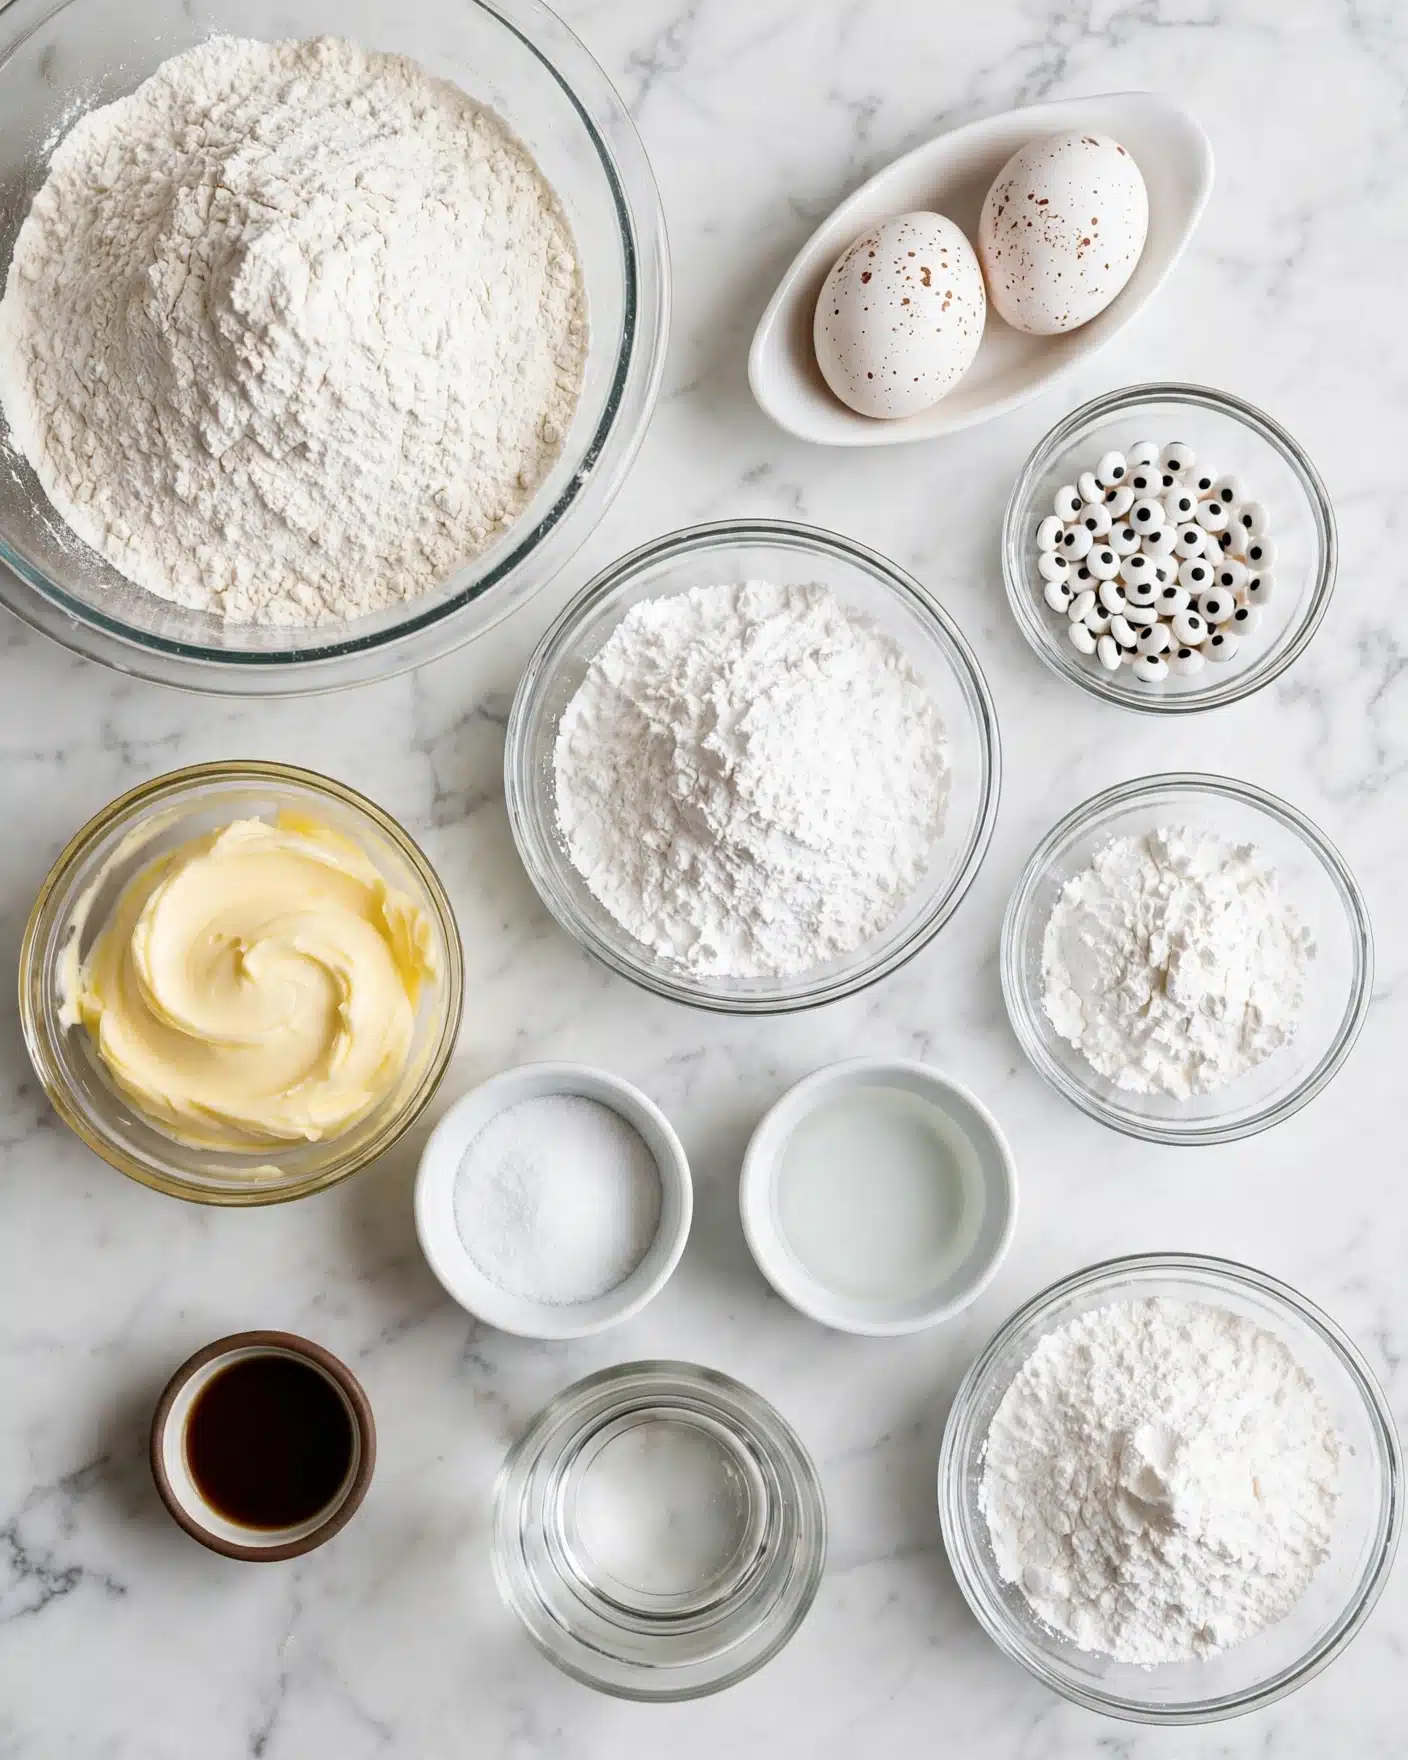
The magic in these cookies comes from a handful of simple, staple ingredients that work harmoniously to create the perfect texture and flavor. Each component is carefully chosen to bring out buttery richness, tender crumb, and a smooth canvas for the glossy royal icing.
- Unsalted butter: Using softened butter ensures your dough is smooth and easy to work with while giving a rich, creamy base flavor.
- Powdered sugar: Provides a delicate sweetness and helps maintain the soft texture of the cookies.
- Small eggs: Size matters here for balanced moisture and structure, so using small eggs keeps everything just right.
- Vanilla extract: The secret to that warm, inviting aroma and classic vanilla essence.
- Salt: Enhances all the flavors, making sure the sweetness isn't overpowering.
- Cornstarch: A little trick to keep the cookies tender without being cakey.
- All-purpose flour: Provides the structure to hold your cookie shapes perfectly during baking.
- Powdered sugar (for icing): The foundation for a smooth, sweet royal icing that hardens beautifully.
- Warm water: Helps achieve the perfect consistency for piping and flooding the icing.
- Meringue powder: Essential for stabilizing the royal icing to hold sharp, clean decorations.
- Clear flavor extract: Adds subtle flavor enhancements without changing the icing’s color.
How to Make Homemade Vanilla Sugar Cookies with Royal Icing Decorations Recipe
Step 1: Cream Butter and Sugar
Start by softening that butter until it's beautifully creamy, then combine it with powdered sugar on medium speed. This process incorporates air, giving your cookies a wonderfully light texture and a melt-in-your-mouth tenderness. The mixing should be just right — smooth and fluffy, a perfect base to build on.
Step 2: Add Eggs and Vanilla
Next, add two small eggs along with the vanilla extract. These ingredients bring structure and that classic flavor punch to your dough. Mix gently to combine, careful not to overwork the batter and lose the softness that makes these cookies exceptional.
Step 3: Combine Dry Ingredients
In a separate bowl, whisk together your flour, salt, and cornstarch. The cornstarch plays an important role in ensuring tender cookies by softening the flour’s impact, while salt balances the sweetness like a pro.
Step 4: Mix Wet and Dry Together
Gradually add the dry mixture to your wet ingredients, mixing on low speed to keep your dough smooth. Make sure to scrape down the sides of the bowl so everything comes together evenly — no lumps or patches here. This patience will pay off with perfectly uniform cookies.
Step 5: Chill the Dough
Pat your dough into a ¼-inch thick sheet and chill it in the refrigerator for 30 minutes. This resting time firms up the dough, which helps your cookies keep those adorable shapes once baked, and makes slicing out the dough simpler and cleaner.
Step 6: Bake the Cookies
Preheat your oven to 350 degrees F and prepare your baking sheet with some non-stick spray. Cut your chilling dough into shapes, place them evenly spaced on the sheet, and bake for 12 to 15 minutes until golden at the edges. The anticipation of that first golden cookie fresh out of the oven is one of the best parts of baking!
Step 7: Prepare Royal Icing
While the cookies cool completely (patience is key here!), mix the powdered sugar, meringue powder, flavor extract, and warm water in your mixer until fluffy peaks form. Adjust the consistency carefully with water — you want it to flow smoothly but still hold its shape for all those gorgeous decorations you have in mind.
Step 8: Decorate with Royal Icing
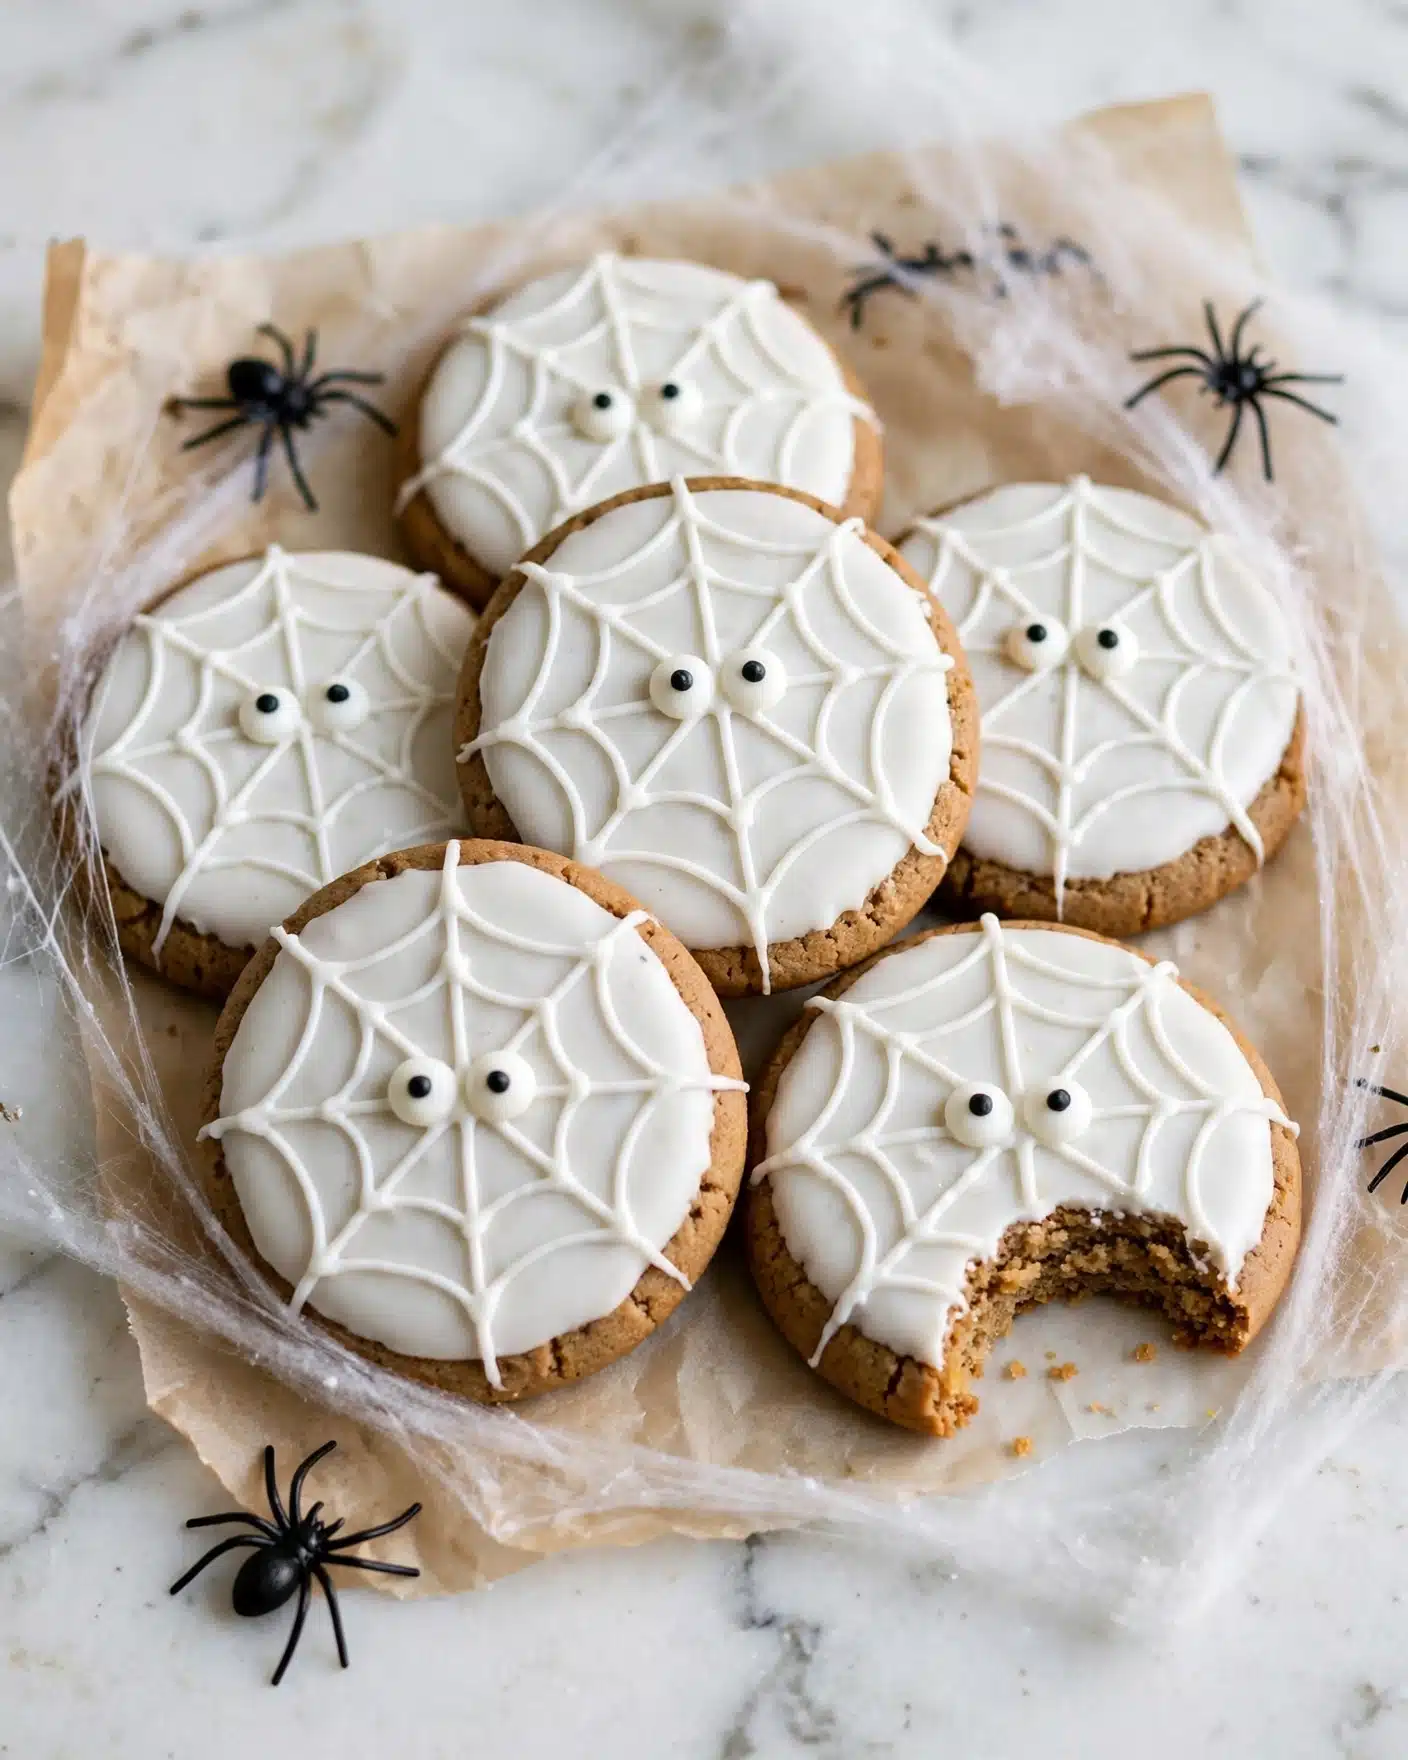
Fill a piping bag or a trimmed plastic bag with your royal icing. Outline each cookie and then flood the interior with a spiral motion, smoothing it quickly using a toothpick or an icing tool. Add detailed designs like eyes or lines, letting each layer set as needed to build beautiful, intricate patterns. The tactile process of decorating with royal icing is a joyful chance to express creativity and make each cookie uniquely yours.
How to Serve Homemade Vanilla Sugar Cookies with Royal Icing Decorations Recipe
Garnishes
A sprinkle of edible glitter or colorful sugar crystals can instantly transform your royal iced cookies for celebrations or special treats. Fresh zest like lemon or orange peel sprinkled lightly after decorating adds a surprising pop of aroma and zestiness that balances the sweetness beautifully.
Side Dishes
These cookies shine brightly on their own but pairing them with a warm cup of chamomile or vanilla-infused tea enhances the vanilla notes wonderfully. A simple glass of cold milk or a creamy soy latte provides cozy companionship, perfect for a delightful break.
Creative Ways to Present
Arrange your decorated cookies on a rustic wooden board or a dainty tiered cake stand for an inviting display. Gift them in clear cellophane bags tied with ribbon or packaged in colorful boxes for a personal touch that friends and family will treasure. These small touches turn a simple cookie into a memorable experience.
Make Ahead and Storage
Storing Leftovers
Store your cooled and decorated vanilla sugar cookies in an airtight container at room temperature. They will stay soft and fresh for up to a week. Make sure to layer them with parchment paper to keep the royal icing decorations intact and prevent sticking.
Freezing
If you want to keep these treats longer, freeze undecorated cookies in a single layer on a baking sheet first, then transfer them to freezer bags. Decorate after thawing. Alternatively, freeze decorated cookies between parchment paper layers to preserve the icing but expect delicate decorations to be slightly more fragile when frozen.
Reheating
While these cookies are wonderful at room temperature, if you prefer a warm treat, pop them into a low oven (about 300 degrees F) for 5 minutes. Avoid microwaving as it can soften the royal icing and affect the texture. Warm cookies will offer a cozy, just-baked feel that’s irresistible.
FAQs
Can I use large eggs instead of small eggs?
Yes, but the dough might become a bit wetter which can affect the texture slightly. If using large eggs, consider reducing the liquid added elsewhere or slightly increasing the flour to adjust consistency.
How long should I let the icing dry before packaging?
It’s best to let the royal icing dry for at least 6 to 8 hours, or even overnight, to ensure it hardens completely and doesn’t smudge when handled or stored.
Can I color the royal icing?
Absolutely! Use gel food coloring sparingly to tint your icing without thinning it out. This lets you create custom colors for all sorts of creative designs on your sugar cookies.
What’s the best way to avoid cracking in the cookies?
Making sure not to overbake and cooling the cookies completely before icing helps avoid cracks. Also, rolling the dough evenly and chilling it properly are key steps for smooth cookie surfaces.
Can I make this recipe gluten-free?
Yes, you can substitute the all-purpose flour with a gluten-free baking blend that includes xanthan gum. It might slightly change the texture, but it’s a great option to keep these cookies accessible to everyone.
Final Thoughts
There is something truly special about creating and sharing the Homemade Vanilla Sugar Cookies with Royal Icing Decorations Recipe. From the buttery vanilla dough to the joyful art of decorating with royal icing, each step invites warmth and creativity into your kitchen. I encourage you to dive in, experiment with your favorite shapes and designs, and see for yourself how these cookies can bring a little more sweetness and connection to your everyday life. Happy baking!
PrintHomemade Vanilla Sugar Cookies with Royal Icing Decorations Recipe

This recipe details how to make soft, buttery sugar cookies with a delicate cornstarch texture, topped with smooth, medium-consistency royal icing perfect for detailed decoration. The cookies are ideal for festive or themed occasions, especially Halloween, featuring a fun mummy-inspired icing design.
- Prep Time: 20 minutes
- Cook Time: 15 minutes
- Total Time: 1 hour 5 minutes
- Yield: Approximately 36 cookies depending on cutter size
- Category: Dessert
- Method: Baking
- Cuisine: American
Ingredients
Cookies:
- 1 cup unsalted butter, softened
- 1 cup powdered sugar
- 2 small eggs
- 1 ½ teaspoons vanilla extract
- ½ teaspoon salt
- ⅓ cup cornstarch
- 3 ½ cups all-purpose flour
Royal Icing:
- 1 ½ cups powdered sugar
- 2 ¼ tablespoons warm water
- 1 tablespoon meringue powder
- ¼ teaspoon clear flavor extract (your favorite flavor)
Instructions
- Mix the Wet Ingredients: In a stand mixer fitted with a paddle attachment, combine softened butter and powdered sugar at medium speed until the mixture is creamy and well combined.
- Add Eggs and Vanilla: Add the two small eggs and vanilla extract to the butter and sugar mixture and mix until fully incorporated.
- Combine Dry Ingredients: In a separate bowl, whisk together the all-purpose flour, cornstarch, and salt to ensure even distribution.
- Incorporate Dry into Wet: Gradually add the flour mixture to the wet ingredients slowly at low speed, making sure to scrape down the sides of the bowl to ensure everything is mixed evenly.
- Chill the Dough: Roll out the dough into a ¼ inch thick sheet on parchment paper or an acrylic sheet, then refrigerate it for 30 minutes to firm up.
- Preheat Oven and Prepare Sheet: Preheat your oven to 350°F (177°C). Spray a baking sheet with non-stick spray and set aside.
- Cut and Bake Cookies: Using cookie cutters, cut shapes from the chilled dough and arrange them on the prepared baking sheet. Bake for 12 to 15 minutes or until edges are lightly golden.
- Cool Completely: Remove cookies from the oven and allow them to cool completely on a wire rack for at least one hour before decorating.
- Prepare Royal Icing: In a stand mixer, whisk powdered sugar, clear flavor extract, warm water, and meringue powder on medium-high speed until the icing is fluffy and forms peaks, about 4 to 5 minutes.
- Adjust Icing Consistency: If the icing is too thick, add warm water in small increments until reaching a medium consistency where icing takes about 15 seconds to settle, good for flooding and detailed piping.
- Transfer Icing to Piping Bag: Place the icing in a piping bag or a ziplock bag with the tip cut small to allow detailed decoration.
- Decorate Cookies: Outline each cookie with icing, then fill by making a spiral pattern inward, spreading the icing evenly with a toothpick or tool. Add decorative eyes, allow to set, then drizzle additional icing to create mummy wrapping effect without covering the eyes.
Notes
- Use small eggs as called for for the right dough consistency.
- Make sure cookies are completely cooled before decorating to prevent melting or sliding of the icing.
- If royal icing becomes too stiff while decorating, add a few drops of water to loosen it.
- Store decorated cookies in an airtight container at room temperature for up to 3-4 days.
- This recipe is ideal for intricate icing designs due to the medium consistency of the royal icing.




Leave a Reply