
Get ready to delight everyone at your next party with this fun and irresistible Monster Cake Pops Recipe! These adorable cake pops are as delicious as they are eye-catching, combining a moist vanilla cake base with colorful candy melts that create a playful, monster-themed treat. Perfect for kids’ birthday parties, Halloween, or anytime you want to add a dash of whimsy to your dessert table, this recipe turns simple ingredients into charming edible art that everyone will love.
Ingredients You'll Need
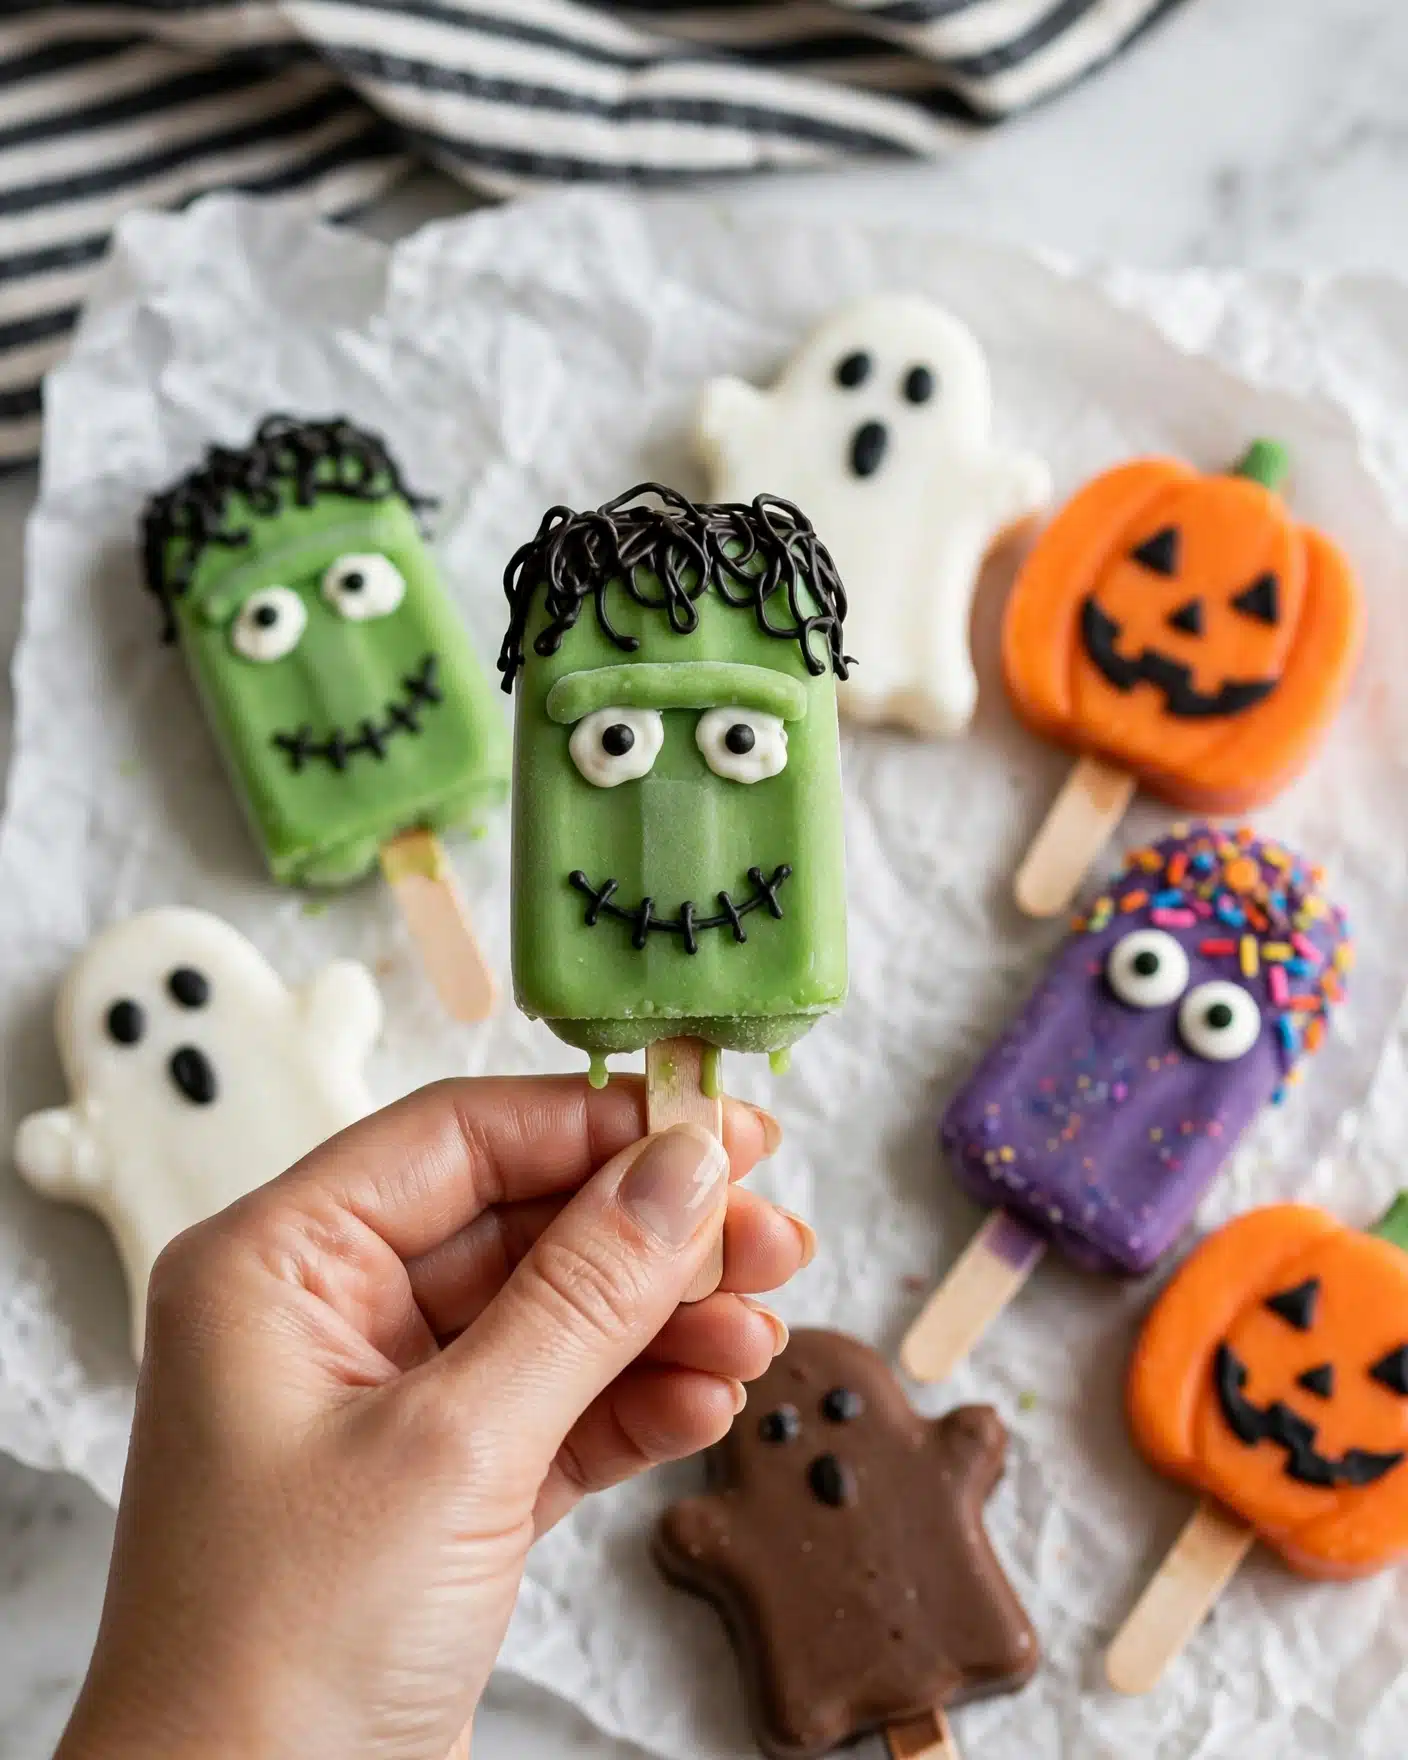
Whipping up these Monster Cake Pops is a breeze thanks to a handful of straightforward ingredients that each play a big role in taste, texture, and appearance. From the fluffy cake foundation to the vibrant candy coating, every element is essential to crafting these cute and tasty monsters.
- Vanilla cake mix plus ingredients on the box: The flavorful, moist base of your pops ready in minutes.
- Powdered sugar (¼ cup): Adds just the right amount of sweetness and helps the cake mixture bind together.
- Vanilla extract (½ tsp): Enhances the cake’s natural flavor with a warm, sweet aroma.
- Color melts (12 oz): These vibrant candy coatings create a smooth, colorful shell perfect for decorating your monsters.
- Cakesicle mold: Shapes your cake mixture into neat popsicles, giving each pop a perfect form.
- Popsicle sticks: The must-have handles to hold and enjoy your Monster Cake Pops with easy and less mess.
How to Make Monster Cake Pops Recipe
Step 1: Bake Your Cake
Start by preparing the vanilla cake mix according to the box directions, but keep an eye on the baking time — you want the cake barely baked through to retain maximum moisture. This moistness is the secret to forming perfect, tender cake pops later on.
Step 2: Mix It Up
Right after you take your cake from the oven, transfer the hot cake crumbs into a stand mixer bowl. Adding the powdered sugar and vanilla extract now and mixing gently helps transform the cake into a pliable dough that holds together beautifully without drying out.
Step 3: Press Into Molds
Divide the cake dough evenly and firmly press it into your cakesicle mold. Use a small silicone spatula to smooth and compact the mixture, ensuring every corner is filled for consistent shapes on each pop.
Step 4: Insert Sticks and Freeze
Don’t forget to place the popsicle sticks firmly into the mold with the cake dough. Freeze the filled molds for about 10 to 15 minutes so that the pops firm up and are easier to dip later.
Step 5: Remove and Chill
Carefully pop your cakesicles out of the mold by pressing down on the stick and easing the cake mixture free. Place the finished cakesicles on a cookie sheet and back into the freezer to stay cool while you work on the remaining pops.
Step 6: Melt Your Candy
Melt your chosen color melts until they are silky smooth, ideally in a tall skinny jar that makes dipping simple and mess-free. This step brings your monster pops to life with bold, captivating color.
Step 7: Dip and Decorate
Dunk each chilled cakesicle into the melted candy and gently shake off any excess for a flawless coating. Let the candy melts set a bit before placing the pops onto a silicone mat to harden completely. Add extra colored melts for eyes, teeth, or other monster features for that fun, spooky charm.
Step 8: Serve and Store
Serve the Monster Cake Pops right away or wrap them individually with cute bags and ribbons for gifting. Store them at room temperature for up to three days, ensuring they're enjoyed fresh and tasty.
How to Serve Monster Cake Pops Recipe
Garnishes
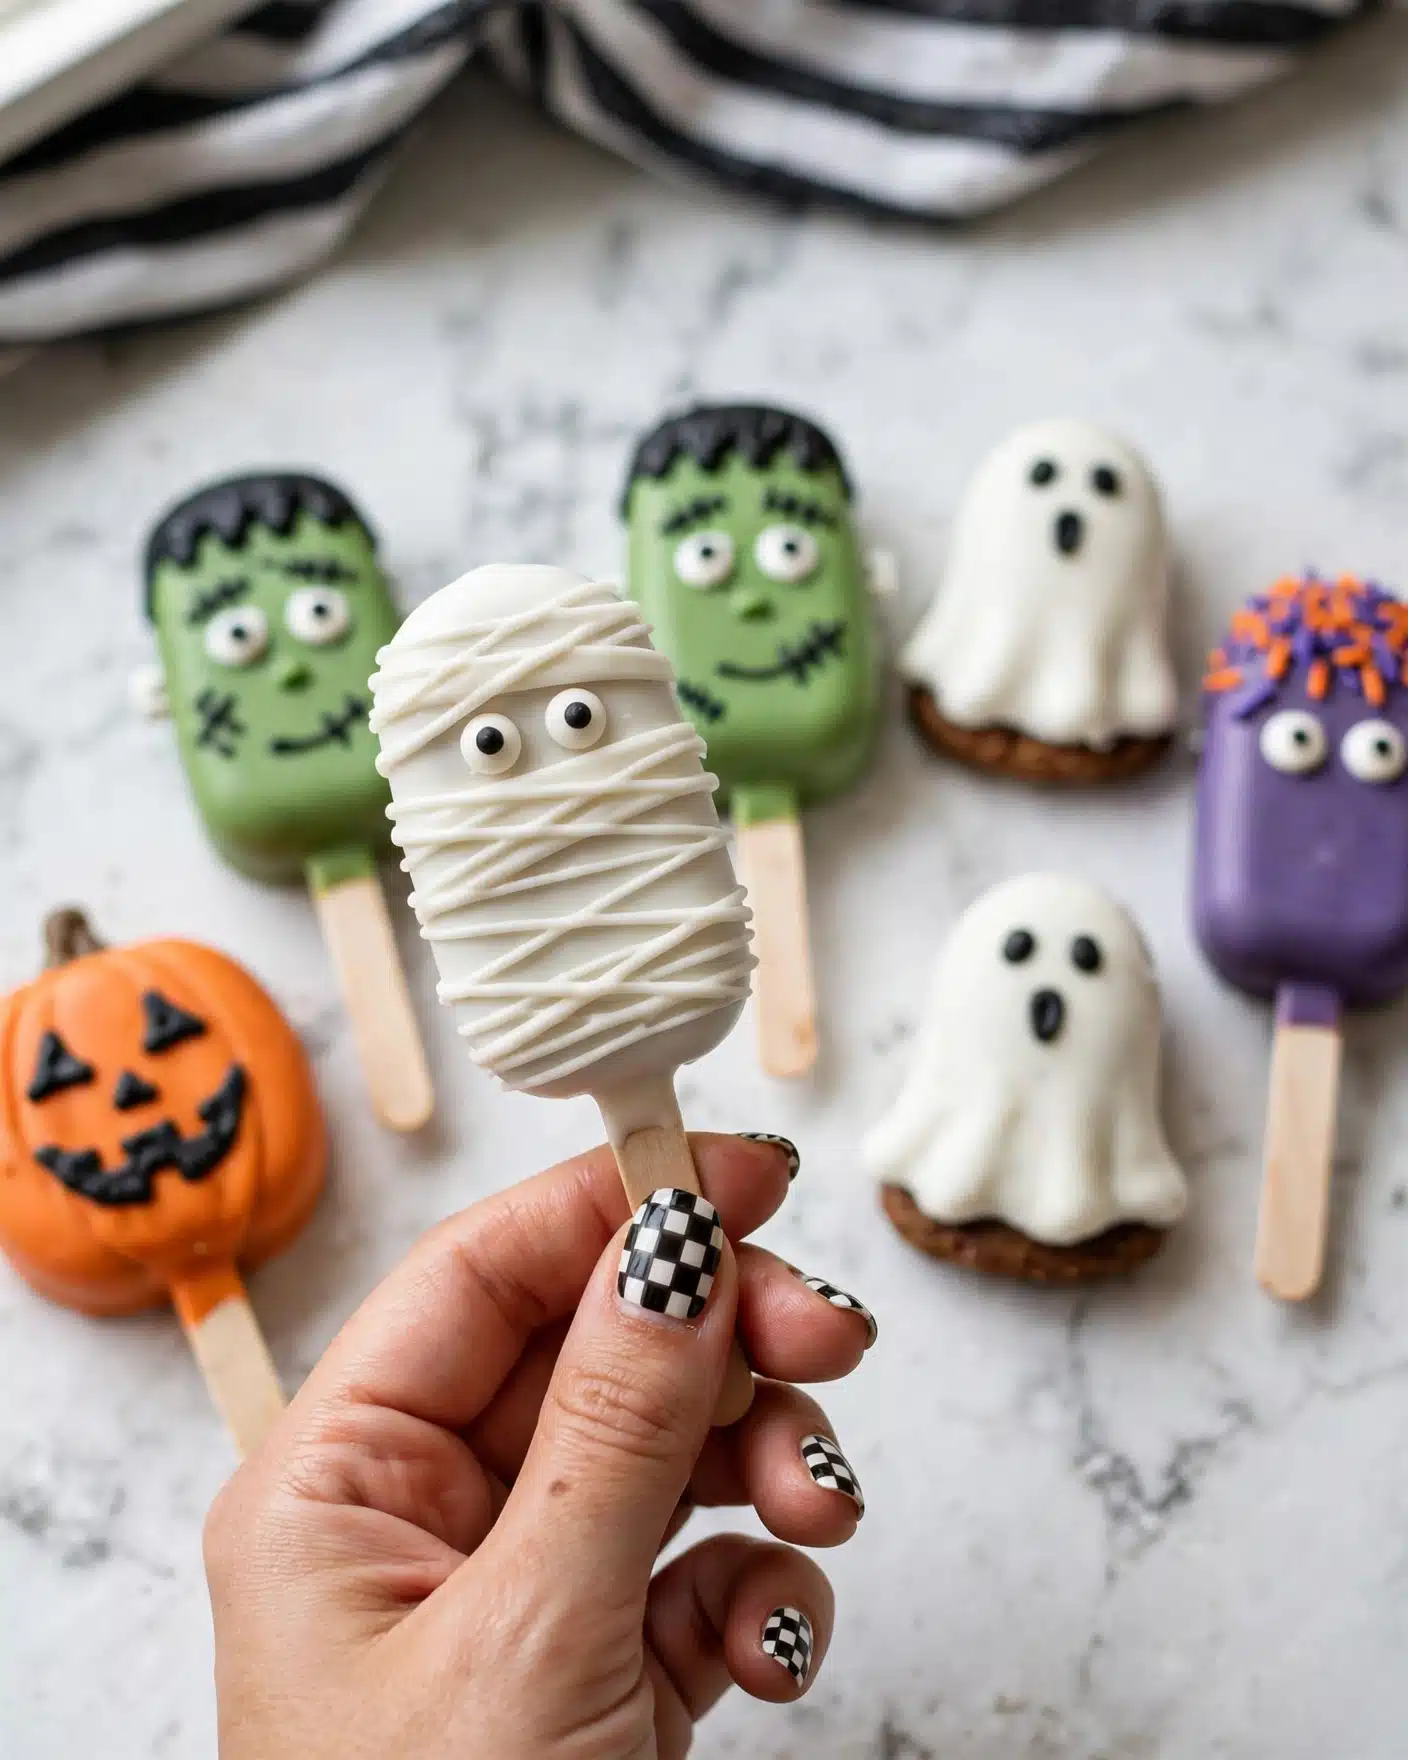
Decorations can take your Monster Cake Pops from simple to spectacular. Use edible googly eyes, colorful sprinkles, or extra drizzle lines of contrasting candy melts to create monster faces bursting with character and whimsy. These little touches add excitement and make your pops picture-perfect.
Side Dishes
Pair these playful desserts with light, refreshing sides like fruit skewers or a simple vanilla yogurt dip to balance the sweetness. They also shine beautifully alongside a cup of milk or hot cocoa, especially for children’s parties or cozy gatherings.
Creative Ways to Present
Display your Monster Cake Pops popping out of a grass-green styrofoam block or nestled in a colorful box filled with tissue paper for a festive touch. For a party centerpiece, plant them like little monsters in a carved pumpkin or arrange them standing tall in jars or vases decorated with ribbon and stickers.
Make Ahead and Storage
Storing Leftovers
If you have any leftover Monster Cake Pops, keep them stored in an airtight container at room temperature away from direct sunlight. They should stay fresh and moist for up to three days, perfect for enjoying a snack later or saving for a small celebration.
Freezing
These cake pops freeze beautifully! Wrap each pop individually in plastic wrap and place in a freezer-safe container or bag. They will keep for up to one month, allowing you to prepare ahead for busy days or parties.
Reheating
No need to reheat these treats! Simply thaw frozen Monster Cake Pops in the refrigerator for a few hours or overnight. Enjoy them chilled for the best taste and texture, just like freshly made.
FAQs
Can I use a different cake flavor for this Monster Cake Pops Recipe?
Absolutely! While vanilla is classic and pairs well with colorful melts, you can experiment with chocolate, strawberry, or any other boxed cake mix you love. Just be sure to keep the cake moist for easy molding.
How do I prevent candy melts from melting too quickly when dipping?
Melting candy at a moderate temperature and stirring frequently helps maintain a smooth consistency. Use a tall, narrow container for easier dipping and work quickly with each pop to prevent drips and overly thin coating.
Can I make these cake pops without a cakesicle mold?
While the molds give the pops a uniform shape, you can roll the cake dough into balls by hand and insert sticks for traditional round cake pops. Just keep your hands slightly damp to prevent sticking.
What if my cake mixture is too crumbly?
Add a little more vanilla extract or a teaspoon of milk to help the mixture come together. The powdered sugar also helps bind the cake crumbs, so ensure you mix thoroughly but gently to form a pliable dough.
How do I decorate the monster faces without making a mess?
Use squeeze bottles or piping bags with fine tips for precision decorating. Practice on parchment paper first and allow each layer to dry before adding eyes or teeth to keep designs crisp and tidy.
Final Thoughts
There is something so joyful about creating and sharing the Monster Cake Pops Recipe. These delightful treats not only bring color and fun to any occasion but also provide an irresistible combination of moist cake and creamy candy coating. I encourage you to gather your ingredients, have a little decorating fun, and watch your friends’ faces light up when they see these charming monster creations. Happy baking and enjoy every bite of these monstrously good cake pops!
PrintMonster Cake Pops Recipe
These Monster Cake Pops are fun, colorful treats made from barely baked vanilla cake mixed with powdered sugar and vanilla extract, molded into cakesicles, and coated with melted candy melts. Perfect for parties or festive occasions, they are easy to decorate and serve.
- Prep Time: 40 minutes
- Cook Time: 30 minutes
- Total Time: 2 hours 20 minutes
- Yield: 16 servings
- Category: Dessert
- Method: Baking
- Cuisine: American
Ingredients
Cake Base
- 1 vanilla cake mix + ingredients required on the box (usually eggs, oil, and water)
- ¼ cup powdered sugar
- ½ tsp vanilla extract
Coating and Decoration
- 12 oz colored candy melts
- Popsicle sticks
- Cakesicle mold
Instructions
- Prepare the Cake: Preheat your oven and prepare the vanilla cake mix according to the instructions on the package, but ensure the cake is baked just until barely done so it remains very moist.
- Mix the Cake Batter: Right after removing the cake from the oven, transfer the hot cake into a stand mixer bowl. Be careful not to overbake as it will be harder to combine.
- Add Sugar and Vanilla: Add powdered sugar and vanilla extract to the warm cake. Using the paddle attachment on low speed, mix until the mixture forms a dough that can be pressed into a ball.
- Shape the Cake Pops: Press the cake dough firmly into the cakesicle molds, smoothing the surface with a small silicone spatula.
- Insert Sticks and Freeze: Insert popsicle sticks into the cakesicle shapes, then freeze the molds for 10-15 minutes until firm.
- Remove from Mold: Carefully remove the chilled cakesicles by holding the stick and gently pushing the mixture out of the mold.
- Freeze Again: Place the cakesicles on a cookie sheet and freeze them again while you finish molding the rest.
- Melt Candy Coating: Melt the colored candy melts in a tall, narrow jar until smooth.
- Dip Cakesicles: Dip the chilled cakesicles one at a time into the melted candy, gently shaking off excess coating. Allow the coating to begin setting while holding them upright.
- Set on Mat: Place the coated cakesicles on a silicone mat to fully set.
- Decorate: Use additional colors of melted candy melts to decorate as desired.
- Serve or Store: Serve immediately or wrap individually in bags tied with ribbons. Store at room temperature for up to 3 days.
Notes
- Ensure the cake is not overbaked to maintain moisture for easier forming of the dough.
- Use a silicone spatula to smooth the cake dough into the molds for a clean finish.
- Freezing the cakesicles twice helps them hold their shape better during dipping.
- Holding the cakesicles upright while the coating sets prevents drips and uneven coating.
- Store at room temperature to maintain the candy coating's texture; refrigeration may cause sweating.


Leave a Reply